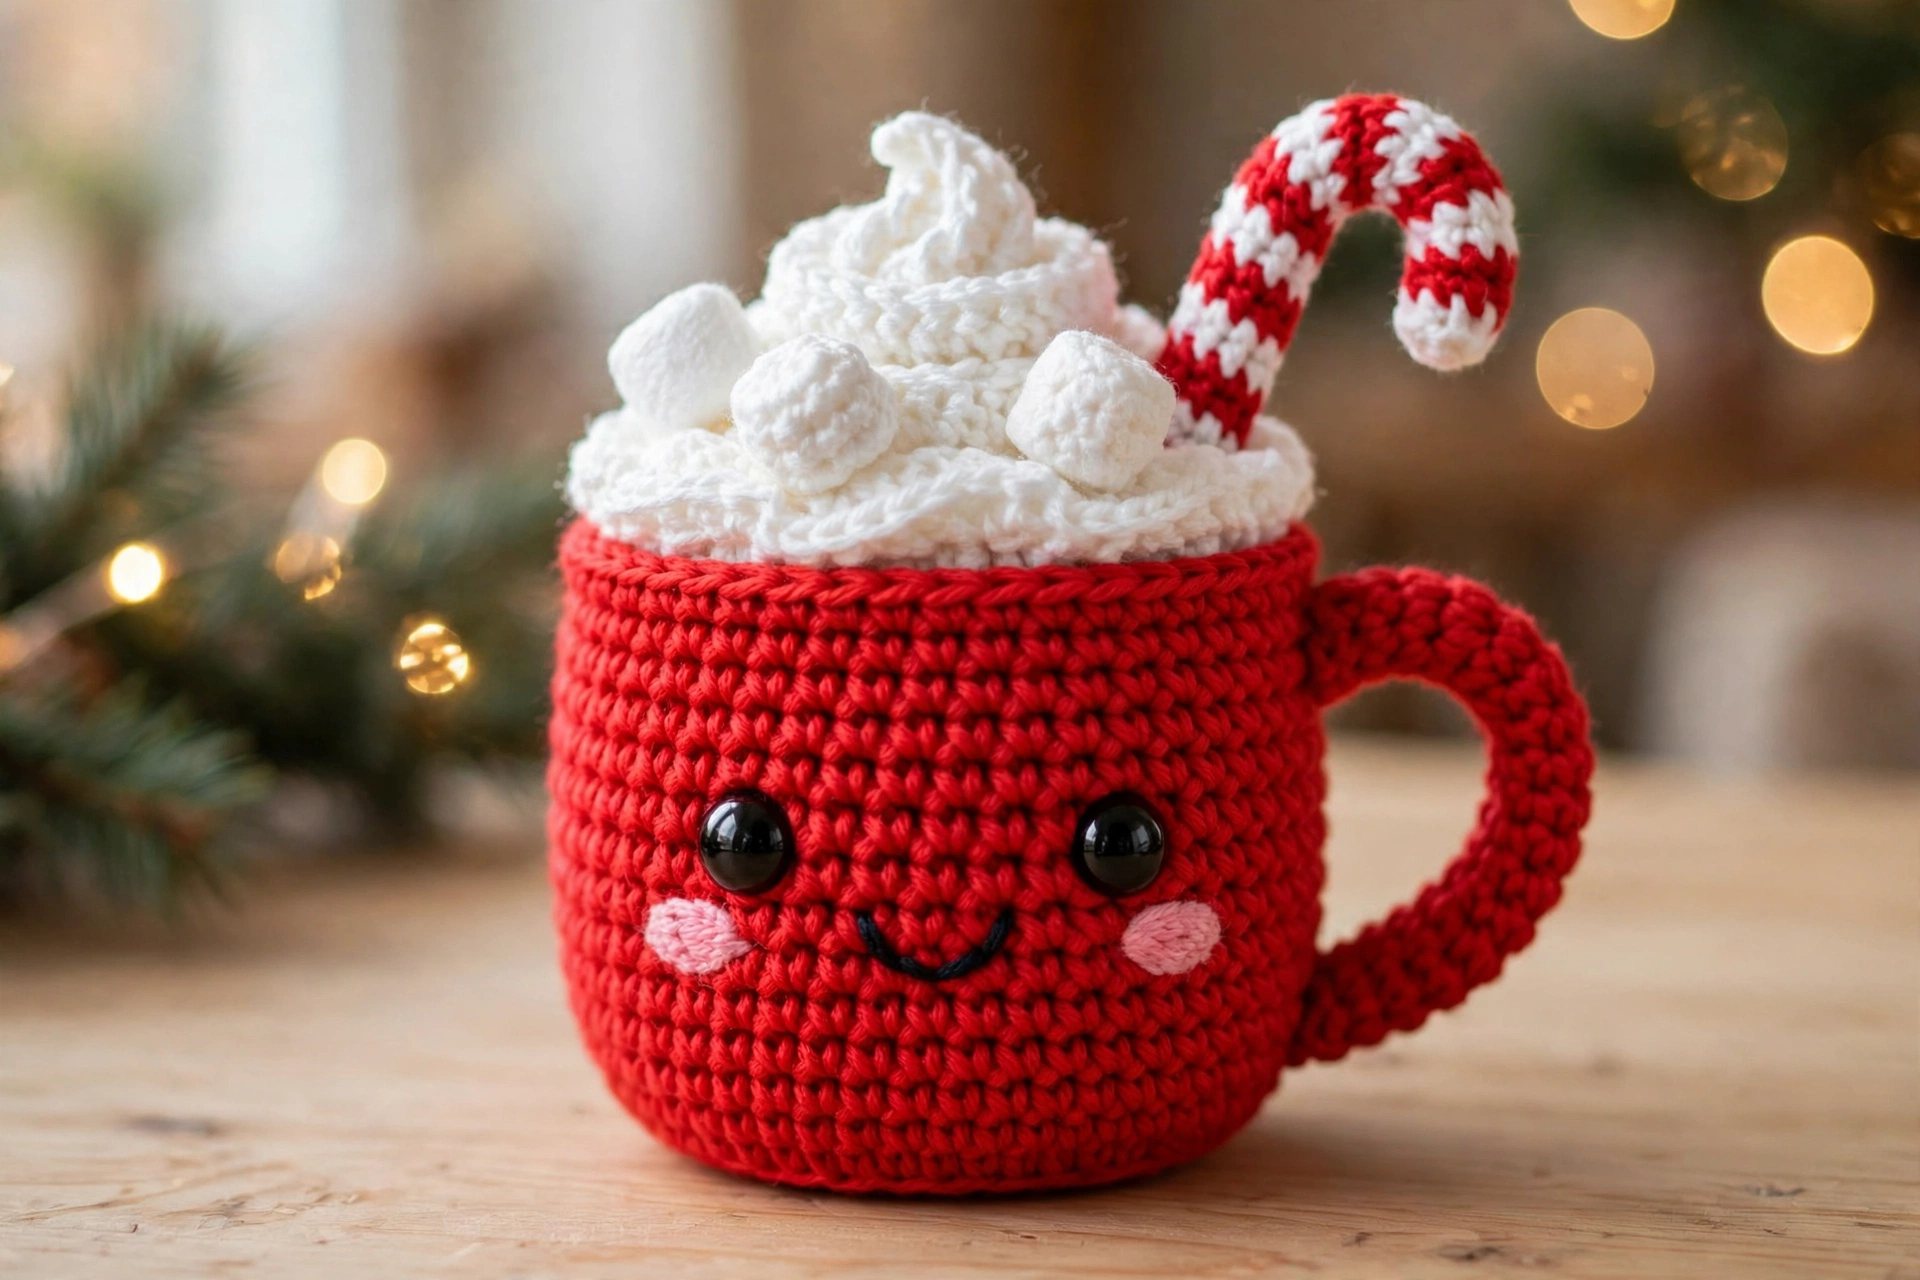
There is nothing cozier than a steaming mug of hot cocoa on a cold December evening, and this free crochet hot cocoa mug pattern turns that feeling into a squishy little keepsake. The finished mug is a cheerful red amigurumi cup with a kawaii smiling face, a swirl of fluffy white whipped cream, three tiny marshmallows and a striped candy cane tucked into the top. It works up in one relaxed evening using only basic stitches, and it makes a sweet handmade gift or mantel decoration.
The finished mug stands about 13 cm (5 inches) tall including the candy cane, and about 9 cm (3.5 inches) wide including the handle. Every part is worked separately and sewn together, so there is no tricky shaping — just simple rounds, a little stuffing, and one very happy little face.
Materials
- Worsted-weight yarn in red (about 50 g), white (about 25 g), dark brown (about 15 g) and pink (a small amount)
- 4.0 mm crochet hook
- Two 8 mm black safety eyes
- Polyester fiberfill stuffing
- Tapestry needle
- Scissors
- Stitch marker
- A short length of chenille stem (pipe cleaner) for the candy cane
Step 1: Crochet the Hot Cocoa Mug Body
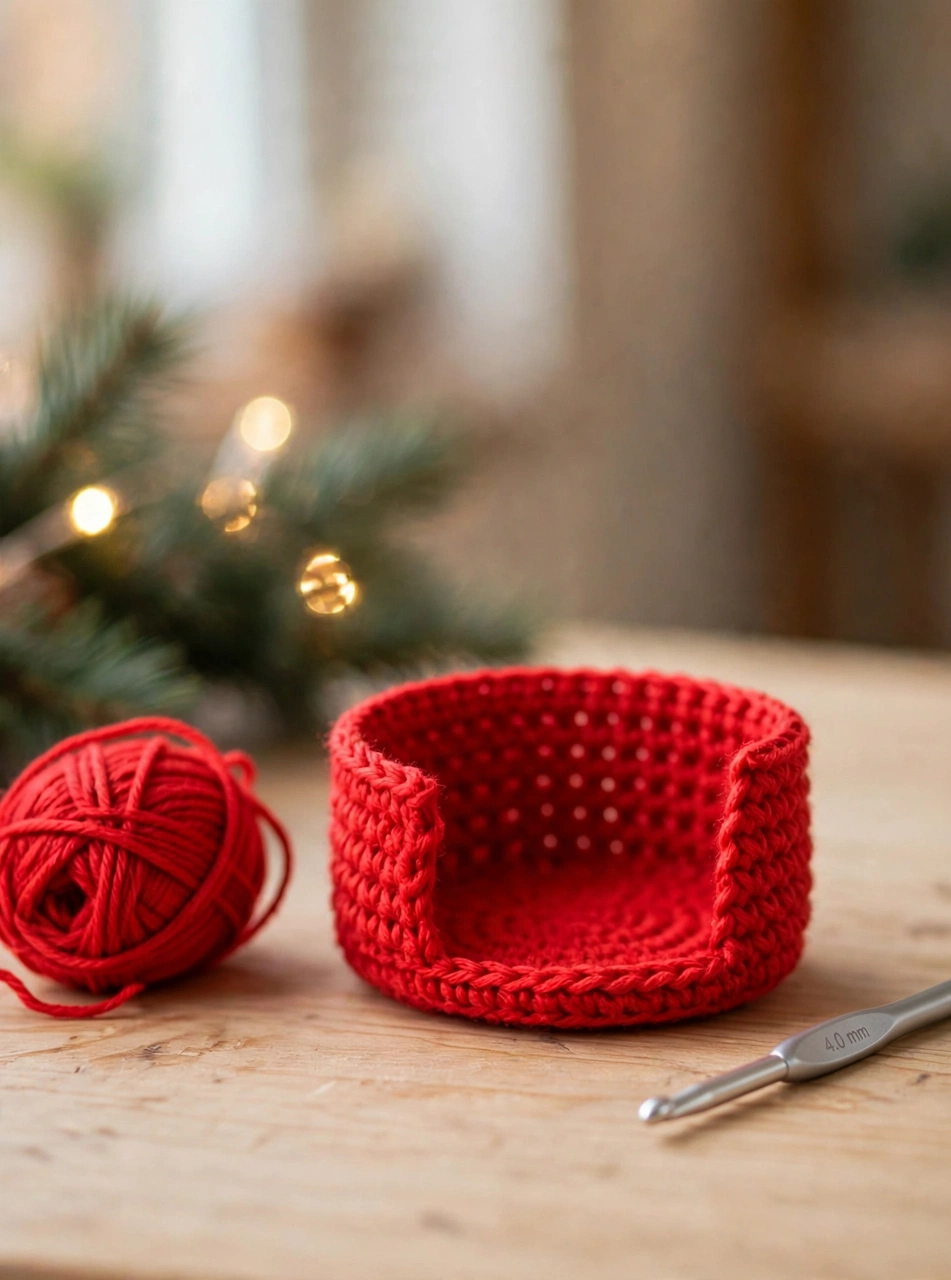
Start your crochet hot cocoa mug pattern with the mug body in red yarn. Work 6 single crochets into a magic ring, then increase evenly: 12 stitches in round 2, 18 in round 3, 24 in round 4, 30 in round 5, 36 in round 6 and 42 in round 7. That flat circle is the base of the mug. In round 8, work one round of single crochet in the back loop only — this creates the crisp little edge where the base meets the sides. Then work rounds 9 to 20 in plain single crochet, 42 stitches in every round, to build the tall, straight sides. Work in a continuous spiral and move your stitch marker up at the start of each round so you never lose your place. Finish with a round of slip stitches for a neat rim.
Step 2: Crochet and Attach the Handle
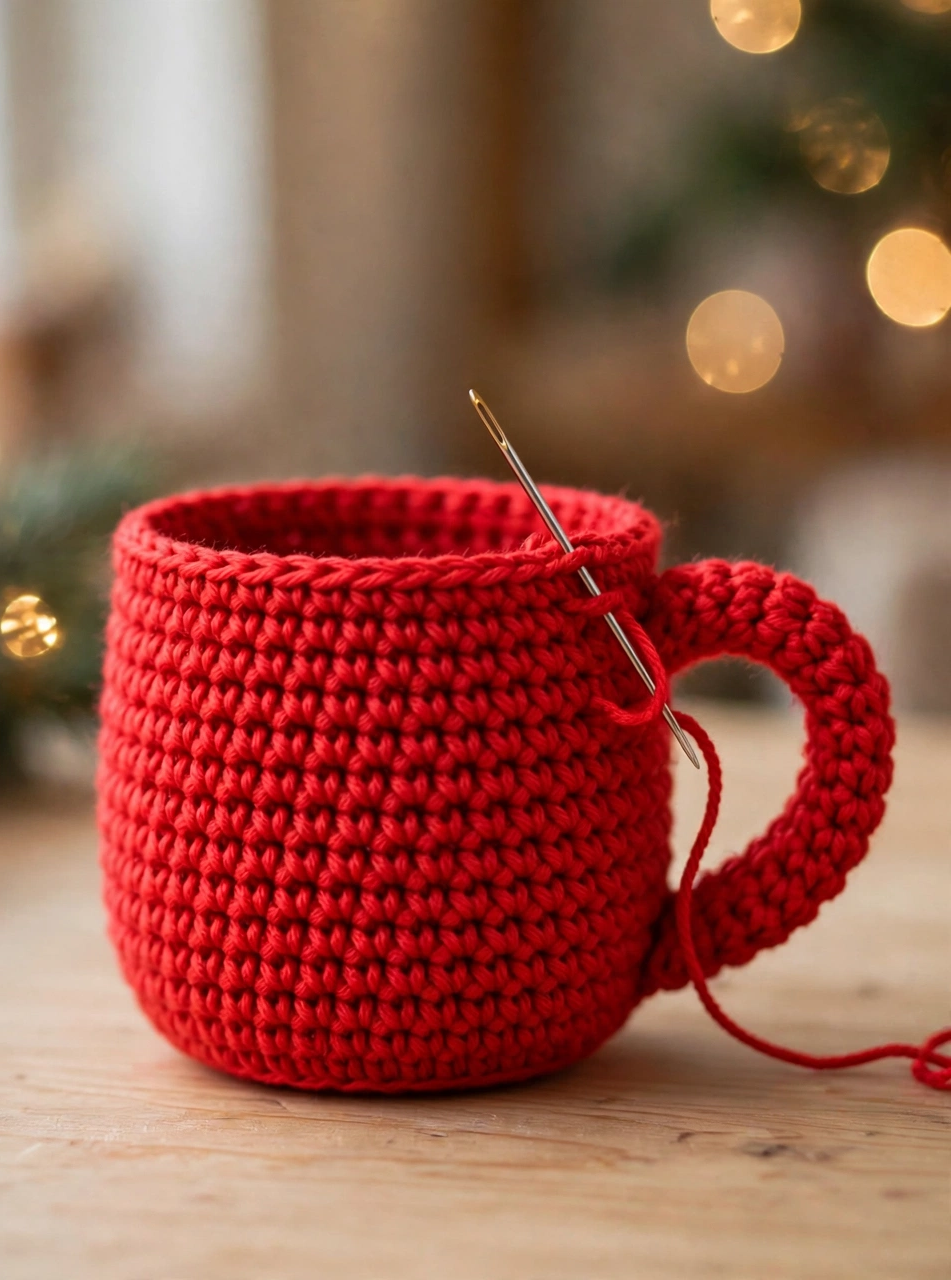
The handle is a simple flat strip that you bend into a C shape. With red yarn, chain 16, then single crochet in the second chain from the hook and in each chain across — 15 stitches. Chain 1, turn, and work a second row of 15 single crochets. Fasten off, leaving a long tail. Bend the strip into a gentle curve and pin both ends to the side of the mug, one near the top rim and one near the base. Sew each end firmly in place, stitching through the strip and the mug wall several times so the handle can take a little tug without coming loose.
Step 3: Add the Kawaii Face

Now the mug gets its personality. Fix the two black safety eyes between rounds 14 and 15 of the body, about 6 stitches apart, and press the washers on firmly from the inside. With black yarn, embroider a small curved smile two rounds below the eyes. The rosy cheeks are tiny pink circles: work 6 single crochets into a magic ring in pink yarn, join with a slip stitch, and fasten off. Sew one cheek on each side of the smile, just below the eyes. Check the face from the front as you go — the eyes should sit level and the smile should curve evenly on both sides. If you are making this mug for a small child, embroider the eyes instead of using safety eyes.
Step 4: Crochet the Hot Chocolate and Whipped Cream
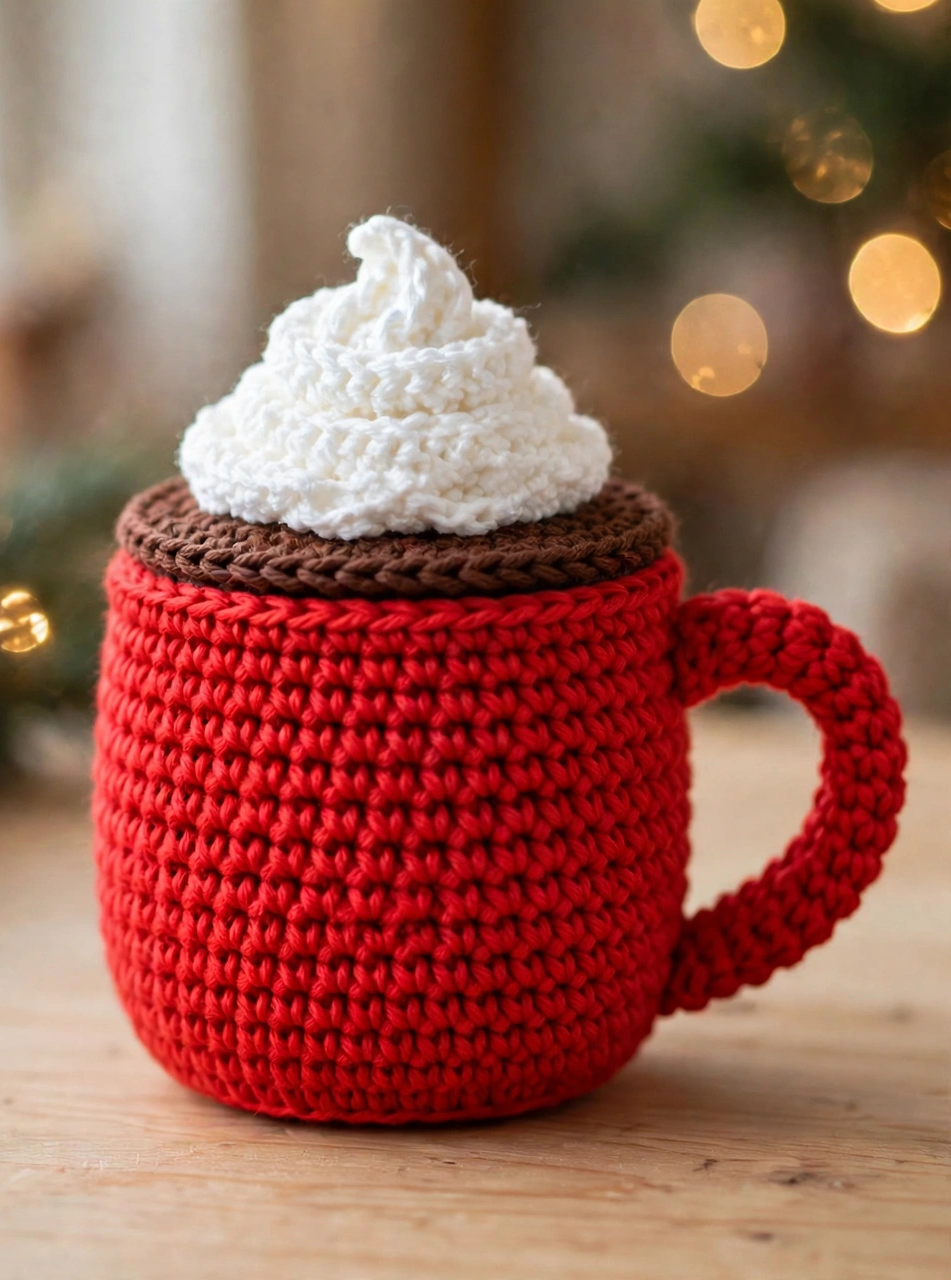
The topper is what sells the whole hot cocoa mug. First, the hot chocolate: with dark brown yarn, work 6 single crochets into a magic ring, then increase evenly to 12, 18, 24, 30, 36 and 42 stitches — exactly the same as the mug base, so the disc sits neatly inside the rim. Work one plain round of 42 stitches and fasten off. Next, the whipped cream swirl in white: work 6 single crochets into a magic ring, increase to 12, 18, 24, 30 and 36 stitches, then work two plain rounds of 36. Now decrease to shape the peak: 30 stitches, then 24, then 18, then 12, then 6 — stuffing the swirl lightly as you go so it holds its soft, piped shape. Fasten off and sew the cream swirl to the centre of the brown disc.
Step 5: Make Three Mini Marshmallows

The marshmallows are tiny white cylinders, and you need three of them. For each one, work 6 single crochets into a magic ring in white yarn, increase to 12 stitches in round 2, then work four plain rounds of 12 stitches. Decrease with one single crochet and one decrease repeated four times — 8 stitches — then fasten off and weave the tail through the last 8 stitches to close the top. Add just a pinch of stuffing before you close it so the marshmallow keeps its plump little shape.
Step 6: Assemble Your Crochet Hot Cocoa Mug Pattern

Time to put it all together. Stuff the red mug firmly with fiberfill, pushing the stuffing right down to the base so the mug stands up straight without wobbling. Lay the brown hot chocolate disc across the top rim and sew it in place all the way around, catching the rim stitches of the mug as you go. Sew the whipped cream swirl to the centre of the disc, then nestle the three marshmallows into the cream and stitch each one down with a few hidden stitches.
Finally, the candy cane: work a tube of 6 single crochets in the round, alternating red and white every two rounds for 14 rounds, then slide a chenille stem inside and bend the top into a hook shape. Push the straight end of the cane into the cream swirl and stitch it in place. Weave in every loose end, and your crochet hot cocoa mug pattern is finished.
Tips for Your Crochet Hot Cocoa Mug Pattern
- Work in a continuous spiral: keep a stitch marker at the start of every round on the mug body. It keeps the sides perfectly even and stops you losing count halfway up the mug.
- Stuff firmly, but not overfull: the mug should feel springy and stand upright on its own. If the sides bulge outwards, pull a little stuffing back out before you sew the topper on.
- Sew the cream swirl on before the candy cane: once the swirl is anchored to the hot chocolate disc, the candy cane has something solid to lean into, so it stands upright instead of flopping over.
Frequently Asked Questions About This Crochet Hot Cocoa Mug Pattern
Is this crochet hot cocoa mug pattern suitable for beginners?
Yes. The whole project uses only single crochet, increases, decreases, chains and slip stitches. If you can work a magic ring and count to 42, you can make this mug.
How big is the finished hot cocoa mug?
The finished mug is about 13 cm (5 inches) tall including the candy cane, and about 9 cm (3.5 inches) wide including the handle. A set of them looks lovely grouped together on a shelf.
Can I turn the hot cocoa mug into a Christmas ornament?
Absolutely. Just crochet a chain of 20 stitches in red yarn, join it into a loop, and sew it to the top of the whipped cream swirl before you add the candy cane. The mug is light enough to hang from a tree branch, and it also works as a gift tag or a stocking charm. For more striped Christmas fun, try our crochet candy cane pattern next.
What yarn works best for this pattern?
Worsted-weight cotton or acrylic yarn both work well with a 4.0 mm hook, which gives tight, neat stitches that hide the stuffing. Cotton gives the crispest stitch definition, while a soft acrylic makes the whipped cream swirl extra fluffy. Any good-quality worsted yarn, such as the ones from Lion Brand Yarn, will give you a lovely result.
Conclusion: Your Crochet Hot Cocoa Mug Pattern Is Finished
This crochet hot cocoa mug pattern is the coziest little project in our Christmas collection: a happy red mug, a swirl of cream, three marshmallows and a candy cane, all in one evening’s work. Make one for your mantel, one for a friend’s stocking, and one for the tree — and download the free printable PDF pattern below so you can crochet it again whenever the cocoa craving strikes. Happy crocheting, and happy holidays!