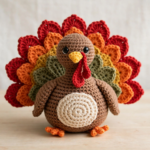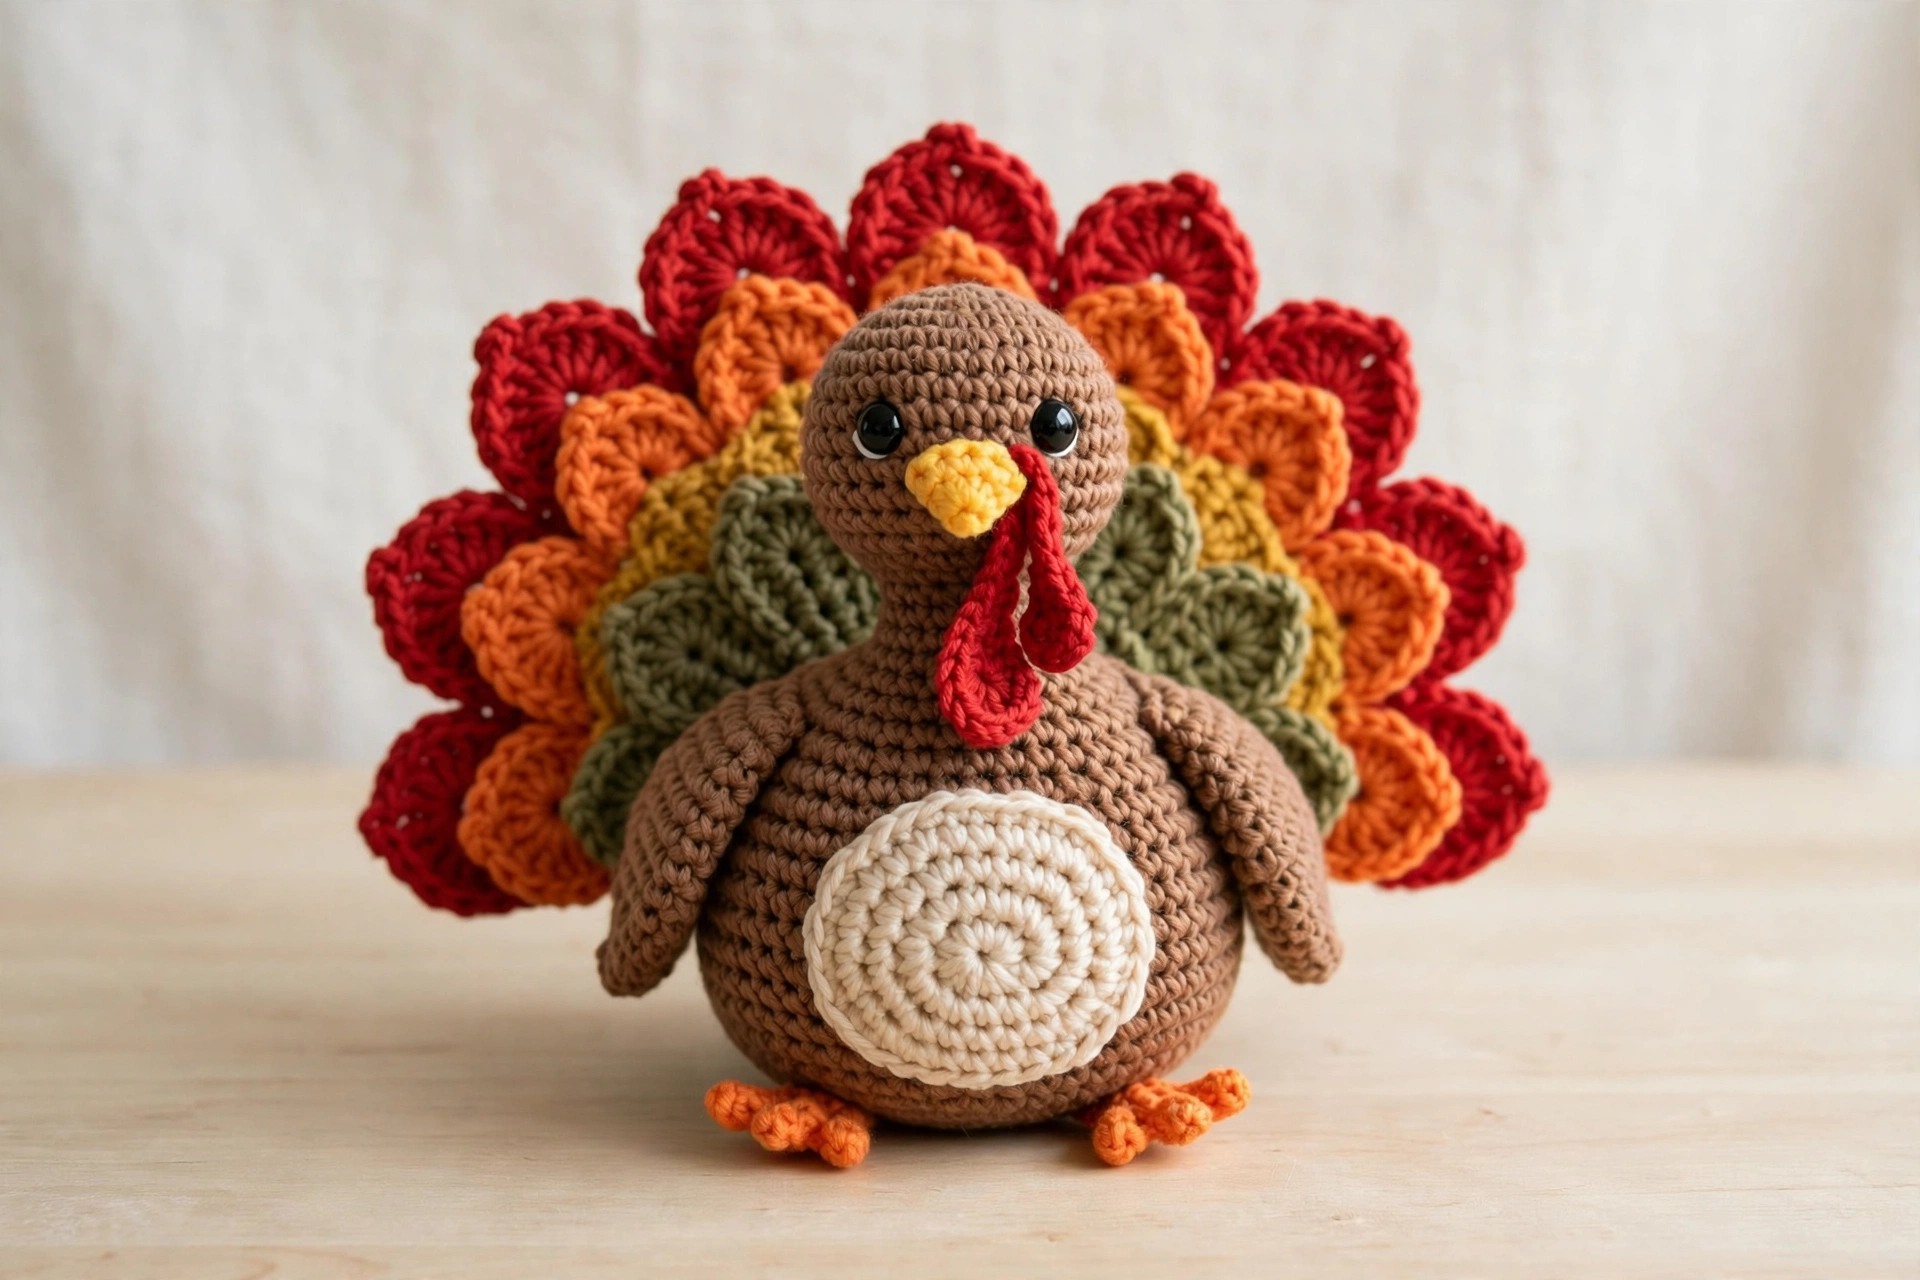
Looking for a centerpiece that steals the show before dinner even starts? This crochet turkey pattern is a free, beginner-friendly amigurumi tutorial that walks you through every stitch — from the magic ring to the final feather. The finished turkey stands about 20 cm (8 inches) tall, with a plump brown body, a cream belly patch, a big fanned tail in harvest red, orange, mustard yellow and olive green, and a sweet face with a yellow beak and red wattle. It works up in one cozy weekend — perfect for a Thanksgiving table or fall mantel.

Materials You’ll Need for This Crochet Turkey Pattern
- Worsted-weight (#4) yarn in brown, cream, red, orange, mustard yellow and olive green; a quality acrylic or cotton yarn gives the best stitch definition — Lion Brand’s worsted cotton lines are a reliable pick for amigurumi.
- 4.0 mm crochet hook, 10 mm black safety eyes (for children under 3, embroider the eyes instead), polyester fiberfill stuffing, stitch marker, tapestry needle, scissors
Abbreviations (US terms): MR = magic ring, sc = single crochet, hdc = half double crochet, dc = double crochet, inc = increase (2 sc in the same stitch), dec = invisible decrease, st = stitch, R = round, ch = chain.
Step 1: Crochet the Turkey Body Base
Work in brown yarn in continuous spirals (no joining), placing your stitch marker in the first stitch of each round so you never lose your place.
- R1: 6 sc in a magic ring (6)
- R2: inc in each st (12)
- R3: [sc, inc] × 6 (18)
- R4: [2 sc, inc] × 6 (24)
- R5: [3 sc, inc] × 6 (30)
- R6: [4 sc, inc] × 6 (36)
- R7–R10: sc in each st (36) — 4 plain rounds
Keep your tension even so the body grows into a smooth, plump ball — this is the base that the belly, tail, head and wings all sit on.

Step 2: Shape, Stuff and Add the Cream Belly
Now taper the body with invisible decreases and stuff it firmly for that chubby, huggable shape, then add the cream belly patch.
- R11: [4 sc, dec] × 6 (30)
- R12: [3 sc, dec] × 6 (24) — begin adding fiberfill now, a little at a time.
- R13: [2 sc, dec] × 6 (18)
- R14: [sc, dec] × 6 (12) — stuff firmly before this round is finished.
- R15: dec × 6 (6). Fasten off, weave the tail through the front loops, and pull closed.
Cream belly patch (cream yarn): R1: 6 sc in a magic ring (6). R2: inc in each st (12). R3: [sc, inc] × 6 (18). R4: [2 sc, inc] × 6 (24). R5: [3 sc, inc] × 6 (30). Fasten off, leaving a long tail, and sew the patch to the front of the body, centered and slightly low.

Step 3: Crochet the Harvest Fan Tail Feathers
The fan tail is the star of this crochet turkey pattern. Each feather is a flat leaf shape, worked in rows — make nine: 3 red, 2 orange, 2 mustard yellow and 2 olive green.
- Ch 12. Row 1: sc in the 2nd ch from the hook, hdc in the next 2 ch, dc in the next 4 ch, hdc in the next 2 ch, sc in the next 2 ch, 3 sc in the last ch, then work back down the other side: sc in the next 2 ch, hdc in the next 2 ch, dc in the next 4 ch, hdc in the next 2 ch, sc in the last ch. Fasten off, leaving a tail for sewing.
Lay the feathers out in a fan before sewing: olive green at the front, then mustard yellow, then orange, with the three red feathers forming the wide outer row at the back. Overlap each feather slightly so no gaps show, then sew the fan firmly to the back of the body. Pair it with our crochet pumpkin pattern for a full Thanksgiving table.

Step 4: Make the Turkey Head, Beak and Wattle
Work the head in brown yarn — a smaller version of the body, so it works up quickly.
- R1: 6 sc in a magic ring (6)
- R2: inc in each st (12)
- R3: [sc, inc] × 6 (18)
- R4: [2 sc, inc] × 6 (24)
- R5–R7: sc in each st (24) — 3 plain rounds. Place the safety eyes between R5 and R6, about 6 stitches apart.
- R8: [2 sc, dec] × 6 (18) — stuff firmly.
- R9: [sc, dec] × 6 (12)
- R10: dec × 6 (6). Fasten off and close like the body.
Beak (mustard yellow yarn): R1: 4 sc in a magic ring (4). R2: [sc, inc] × 2 (6). R3: sc in each st (6). R4: [2 sc, inc] × 2 (8). Fasten off and sew to the center of the face, just below and between the eyes.
Wattle (red yarn): Ch 10. Row 1: sc in each ch across, starting in the 2nd ch from the hook (9). Next, row 2: dec, sc in the next 5 sts, dec (7). Finally, row 3: dec, sc in the next 3 sts, dec (5). Fasten off and sew the wide end beside the beak so the wattle hangs down over the chest.

Step 5: Crochet the Wings and Little Orange Feet
The wings use the same flat leaf pattern as the tail feathers, worked in brown yarn — make two, flatten them (no stuffing), and keep them slightly curved so they hug the sides of the body.
For the feet, work in orange yarn. Each foot has three little toes: ch 4, slip stitch in the 2nd ch from the hook, sc in the next 2 ch, then slip stitch back into the base to finish one toe. Repeat for three toes per foot, and make two feet. The tiny orange feet peeking out under the body make it look ready to waddle.

Step 6: Assemble Your Crochet Turkey
Sew the pieces on in this order: first the fan tail to the back of the body, then the head to the top front, tilting it very slightly forward. Next sew the wings to the sides, angled downward, and finally the feet to the underside, set wide enough apart that the turkey stands on its own.
Check the turkey from the front, sides and back before weaving in the last ends: the tail should fan evenly, the head should sit centered, and the cream belly should face straight forward. Give it a gentle squeeze to settle the stuffing, and it is ready for the table.

Tips for a Perfect Crochet Turkey
- Stuff as you go, in small handfuls. A little fiberfill at a time keeps the body smooth and lump-free.
- Use invisible decreases on the body and head. A regular decrease leaves a small bump; the invisible version keeps the curves perfectly round.
- Lay the tail fan out flat before sewing. Arrange all nine feathers first and check the color order — moving a sewn feather is far harder than moving a loose one.
Frequently Asked Questions About This Crochet Turkey Pattern
Is this crochet turkey pattern suitable for beginners?
Yes. It uses only single, half double and double crochet, increases and invisible decreases, all worked in the round or in simple rows. If you can crochet a ball, you can crochet this turkey.
How long does the crochet turkey take to make?
Most crocheters finish it in one weekend, roughly 5–6 hours of relaxed stitching. The body and head take about half the time, and the nine tail feathers take the rest.
What size is the finished turkey?
Worked in worsted-weight yarn with a 4.0 mm hook, it stands about 20 cm (8 inches) tall and about 22 cm wide across the fan tail. Use a smaller hook and lighter yarn for a mini version, or chunky yarn and a 5.5 mm hook for a big centerpiece.
Can I wash the finished amigurumi turkey?
Yes, hand wash gently in cool water with mild soap, reshape the tail fan while damp, and air dry flat. Avoid the washing machine, which can flatten the feathers and loosen the safety eyes.
Conclusion
This free crochet turkey pattern gives you a plump, cheerful Thanksgiving turkey with a harvest fan tail and a sweet little face — a handmade centerpiece your guests will remember long after dinner. Grab your brown, cream and harvest yarns, follow the six steps above, and happy crocheting!