
This free crochet wheat stitch christmas tree pattern turns a ball of forest green yarn into the prettiest little tree on the mantel: a textured cone with braided wheat stitch columns, a cream star on top, a short brown trunk and tiny gold beads that catch the light. The tree is worked top-down in the round, so there are no seams to sew — just steady rounds that grow from a pointed tip into a classic Christmas cone. The whole project takes about two hours.
The wheat stitch is what makes this tree special. It is a simple puff stitch worked into the stitch below. The puffs stack into neat vertical braids that look far more complicated than they are. If you can chain, single crochet and make a puff stitch, you can make this tree. The texture hides small mistakes beautifully.
The finished tree stands about 15 cm (6 inches) tall, not counting the star, and about 10 cm (4 inches) wide at the base. It sits happily on a mantel, a tiered tray or a desk, and it makes a lovely handmade gift. If you enjoyed our simpler crochet Christmas tree pattern, you will love this textured version.
Materials for This Crochet Wheat Stitch Christmas Tree Pattern
- Forest green worsted-weight (#4) yarn, approx. 60 g / 110 m
- Cream yarn for the star
- Brown yarn for the trunk
- 8-10 small gold beads or buttons
- 5.0 mm (US H-8) crochet hook
- Stitch marker
- Yarn needle
- Scissors
- Small amount of polyester fiberfill
Step 1: Start at the Tip

Every tree starts at the tip. Make a magic ring with your forest green yarn and work 6 single crochets into it, then close the ring and place your stitch marker in the first stitch. Round 2 increases in every stitch to 12, round 3 works one single crochet and one increase six times to reach 18, and round 4 works two single crochets and one increase six times to reach 24.
Work these first rounds firmly but not tightly. The tip holds its point while the stitches stay loose enough for the puff stitches that follow.
Step 2: Grow the Cone
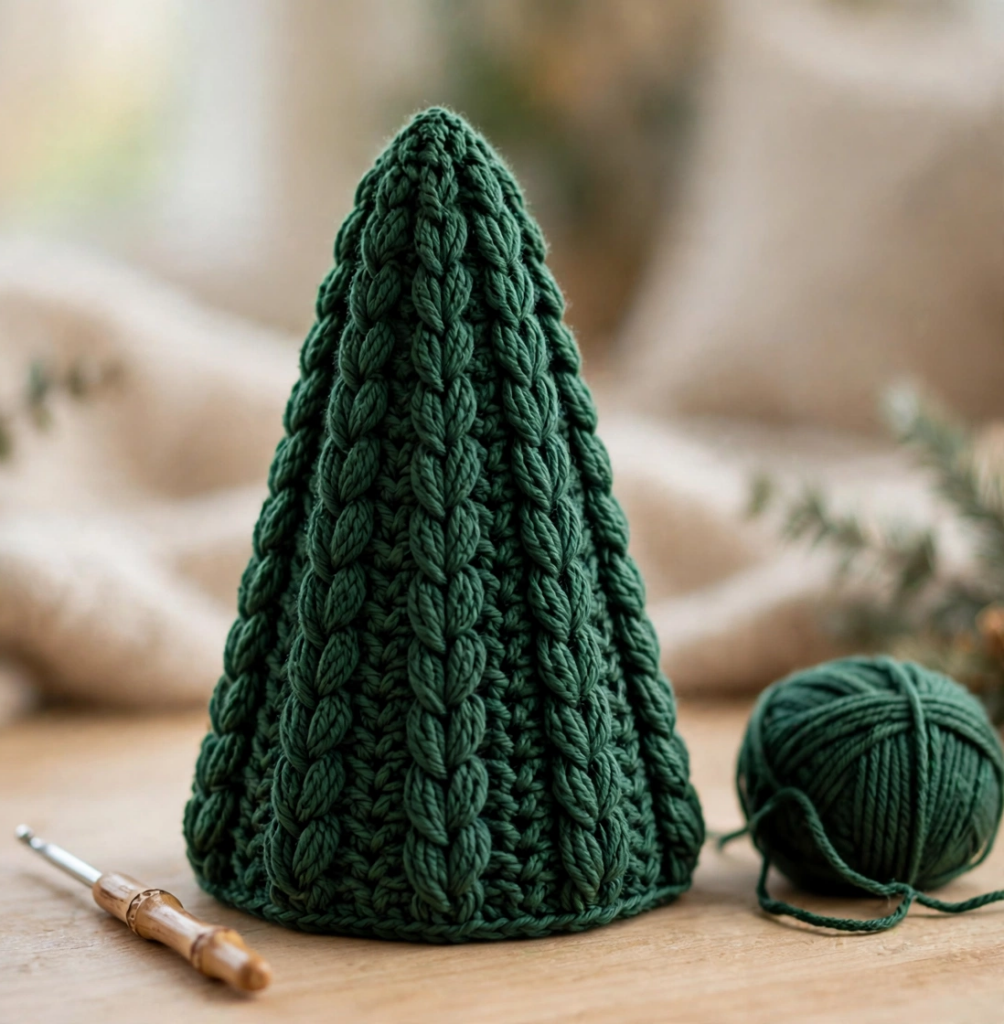
Now the cone starts to grow. Rounds 5 to 8 continue the same increase rhythm: round 5 works three single crochets and one increase six times for 30 stitches, round 6 works four and one for 36, round 7 works five and one for 42, and round 8 works six and one for 48 — six new stitches per round, so the cone widens evenly.
This is also where the braided texture begins to show. Once the increase rounds are done, the puff stitches line up into the vertical braids that give this textured crochet tree its name. Keep your stitch marker moving to the first stitch of every round. The increases are easy to lose in the texture.
Step 3: Work the Wide Rounds of This Crochet Wheat Stitch Christmas Tree Pattern

With the cone at its full width of 48 stitches, the next four rounds are pure wheat stitch — the most satisfying part of this crochet wheat stitch christmas tree pattern. Work rounds 9 to 12 by repeating a puff stitch in the next stitch, chain 1, skip 1 stitch, all the way around, for 24 wheat stitches per round. The puffs lean into each other and form the braided columns running down the tree.
Keep the puff stitches loose so the wheat texture stays soft and braided-looking; a relaxed hand is the whole secret here. After the four wheat stitch rounds, round 13 is a plain round of single crochet in every stitch, 48 stitches in total, which steadies the edge for sewing the base on.
Step 4: Crochet the Round Base

A tree that stands up needs a flat bottom, so the next piece is a simple circle in the same forest green yarn. Start with a magic ring and 6 single crochets, then increase evenly to 12, 18, 24, 30, 36, 42 and finally 48 stitches in round 8 — exactly matching the open bottom of the cone. Fasten off, leaving a long tail for sewing.
Stuff the cone lightly with polyester fiberfill before you sew the base on. A gentle, even fill is all it takes for the tree to stand straight. Then sew the base to the open bottom of the cone with small, neat stitches all the way around.
Step 5: Add the Trunk and Star

The trunk is a tiny tube worked in brown yarn: a magic ring with 6 single crochets, then three plain rounds of 6 single crochets. Fasten off and sew it to the centre of the base, underneath the tree.
The star is the crowning touch. With cream yarn, make a magic ring, then work five points into the ring — for each point, chain 2, double crochet into the ring, chain 2, slip stitch into the ring — and fasten off. Sew the star firmly to the tip of the tree. If you have never worked the wheat stitch before, the wheat stitch tutorial at Briana K Designs is a wonderful visual guide to the puff stitch at the heart of this pattern.
Step 6: Decorate and Finish

Now for the fun part: sew 8 to 10 small gold beads evenly around the cone, spacing them between the braided wheat columns so they sit in the little valleys of the texture. A bead or two near the top, a few more around the middle and a ring near the base gives a balanced, decorated look — and sewn-on beads stay put for years.
Weave in all the loose ends. Trim the tails close to the fabric, then stand the tree up and check it sits level.
Tips for a Perfect Crochet Wheat Stitch Christmas Tree Pattern
- Keep the puff stitches loose so the wheat texture stays soft and braided-looking. Tight puffs pull the fabric in and make the cone stiff.
- Mark the first stitch of every round — the increases are easy to lose in the texture.
- Stuff the cone lightly before sewing the base on, so the tree stands straight. Too much fiberfill will stretch the wheat stitch and widen the cone.
FAQ
Is this crochet wheat stitch christmas tree pattern suitable for beginners?
Yes — it is rated advanced beginner and a great first textured project. You only need to chain, single crochet, increase and make a puff stitch. The wheat stitch is just a puff stitch worked into the stitch below.
How long does the wheat stitch tree take to crochet?
About two hours from the first magic ring to the last gold bead: around an hour for the cone, and the rest for the base, trunk, star and decorating. A perfect one-evening project.
What yarn works best for a crochet Christmas tree?
Worsted-weight (#4) acrylic or cotton yarn works beautifully — it holds the cone shape and shows off the wheat stitch texture. Use a 5.0 mm (US H-8) hook, going up half a size if your stitches are very tight.
Can I make the tree bigger or smaller?
Yes, easily. For a taller tree, keep adding increase rounds of six stitches before the wheat stitch rounds, then work more even rounds at the wider count — and grow the base circle to the same stitch count. For a mini tree, stop the increases earlier and make a smaller base.
Conclusion
This crochet wheat stitch christmas tree pattern proves a little texture goes a long way: one simple puff stitch turns a plain green cone into a braided, boutique-worthy Christmas tree. It works up quickly and uses less than a ball of yarn. It looks wonderful grouped in threes on a mantel or standing alone on a desk. Make one for yourself, then another as a gift. Download the free printable pattern below so you can stitch it again next Christmas.