If you have been searching for a crochet frog pattern that is genuinely easy to finish in one sitting, this is the one. This little green frog is the perfect beginner amigurumi project: a round body worked in simple single crochet rounds, big cartoon eyes, and a cheerful embroidered smile. No complicated shaping, no fussy sewing — just one cute frog that looks adorable on a shelf, a desk, or a backpack zipper. In this step-by-step tutorial I will walk you through every round with photos, share the exact materials I used, and answer the most common questions beginners ask about frog amigurumi. Grab your hook and let’s hop to it!
Materials for This Crochet Frog Pattern
- Yarn: Worsted-weight (#4) acrylic in bright green (main), white, and black — a soft, smooth acrylic that shows stitches clearly
- Crochet hook: 4.0 mm (G-6)
- Yarn needle for sewing and embroidering
- Scissors
- Polyester fiberfill for stuffing
- Stitch marker to mark the start of each round
- Optional: tiny pink embroidery floss for the cheeks
Craft Yarn Council’s standards are the authoritative reference I always point beginners to for a full guide to yarn weights and hook pairings.
Step 1: Start with a Magic Ring
Every good crochet frog pattern starts the same way — with a tidy magic ring. Make a magic ring and work 8 single crochet stitches into it, then pull the tail tight to close the center. Place your stitch marker in the first stitch of the round. A magic ring (sometimes called a magic circle) keeps the center of the body completely closed, which matters here because we will stuff the frog later and do not want any fiberfill peeking through.
Step 2: Crochet the Round Frog Body
Work your increases evenly in spiral rounds until the body measures about 8 cm (3 inches) across — typically 6 rounds of increases followed by several even rounds. The classic amigurumi increase sequence (8, 16, 24, 32…) keeps the shaping smooth and round. This round little body is the whole charm of the frog, so take your time and keep your tension even.
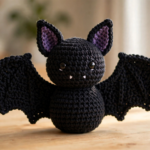
Crochet bat pattern — if you are new to amigurumi, you might enjoy my other beginner tutorial; the shaping technique is nearly identical.
Step 3: Make the Big Cartoon Eyes
The eyes are what make this frog irresistible. With white yarn, make a magic ring and work 2 rounds of single crochet to form a small flat circle, then switch to black yarn for one final round — or simply embroider a black pupil in the center. Make two identical eyes. Keep them firm and flat; loosely worked eyes will curl, and flat eyes sit much better on the frog’s head.
Step 4: Attach the Eyes and Embroider the Smile
Position the two eyes on top of the head, slightly apart, and sew them on with the yarn needle using small, even stitches. Then thread black yarn and embroider a wide, happy smile across the face — two short curved lines meeting in the middle work beautifully. Add two tiny pink French knots for cheeks if you like a kawaii look. Step back and check the symmetry before you finish; straight-on eyes are the difference between cute and adorably professional.
Step 5: Crochet the Little Feet
This frog pattern needs just a touch of personality at the base: two small oval feet. Chain 6, work single crochet around both sides of the chain, and fasten off, leaving a long tail for sewing. Sew the feet to the bottom front of the body, angled slightly outward. These little feet let the frog sit upright on its own, which is exactly what you want for a shelf or desk display.
Step 6: Stuff, Close, and Finish
Stuff the body firmly but not over-full with polyester fiberfill — overstuffing stretches the stitches and shows gaps, while understuffing leaves the frog floppy. Continue the decrease rounds until the opening closes, fasten off, and weave in every tail with the yarn needle. Give the frog a gentle squeeze to even out the stuffing, fluff the eyes into place, and admire your work. Your handmade frog is ready!
Tips for the Perfect Crochet Frog
- Use a hook one size smaller than your yarn label suggests. Tighter stitches mean no stuffing shows through — the golden rule of amigurumi.
- Count your stitches every round. One missed increase early on warps the whole body; a stitch marker and a quick count save hours of frogging.
- Sew the eyes on before stuffing is fully packed. It is much easier to reach inside and secure knots while the body is still soft.
Frequently Asked Questions
Is this crochet frog pattern good for absolute beginners?
Yes! If you can single crochet in the round and do basic increases and decreases, you can make this frog. There is no colorwork and only two tiny pieces to sew on.
How long does it take to crochet the frog?
Most beginners finish in 2–3 hours. Once you know the pattern, you can whip one up in about 90 minutes — they make wonderful last-minute gifts.
What yarn works best for a crochet frog amigurumi?
Smooth worsted-weight acrylic is ideal: it is affordable, holds its shape, and the stitches are easy to see. Cotton yarn also works and gives a lovely matte finish. Avoid fuzzy or novelty yarns for your first frog, since counting stitches in them is frustrating.
Can I make the frog bigger or smaller?
Absolutely. Use chunky yarn with a 5.5 mm hook for a huggable plush, or sport-weight yarn with a 3.0 mm hook for a pocket-sized keychain frog. Just keep the hook one size smaller than the yarn calls for.
Conclusion
And that’s it — your very own crochet frog, made with your own two hands! This crochet frog pattern is one of those projects you’ll come back to again and again: for gifts, for craft fairs, or just because a shelf always looks better with a frog on it. If you made one, I’d love to hear how it turned out.
Crochet tutorials — browse the rest of our tutorials for more beginner-friendly patterns when you’re ready for your next project. Happy crocheting!